Categories
Windows 11

Windows 10 Feature Updates: Upgrade? Delay? Freeze?

window-10-logo-vector

Broadly speaking, Windows 10 receives three kinds of updates:

  • Security Updates – pretty self explanatory, they fix bugs and security holes that have been identified. It’s important to always apply these as soon as possible to protect the integrity of the device, the contents and the network it operates on.
  • Quality Updates – these are monthly releases, sometimes known as cumulative updates, that combine any security patches and OS stability improvements into a single update. Generally released on the second Tuesday of the month, it has coined the term “Patch Tuesday”.
  • Feature Updates – with the decision to standardize Windows on the “Windows 10” moniker, the Feature Updates amount to a new version of Windows 10 and are released approximately every six months, generally around the March/September cadence. Hence, you see release names such as 1903 (released around March 2019) and 1909 (released March 2019).

For a more detailed explanation, this is not a bad starting point to read.

IT Administrators take different approaches to applying these settings based on their preferences and organisational needs. Much of the control of Windows 10 comes down to the Deployment Rings and this documentation is the authoritative starting point.

Deployment rings in Windows 10 are similar to the deployment groups most organizations constructed for previous major revision upgrades. They are simply a method by which to separate machines into a deployment timeline. With Windows 10, you construct deployment rings a bit differently in each servicing tool, but the concepts remain the same. Each deployment ring should reduce the risk of issues derived from the deployment of the feature updates by gradually deploying the update to entire departments. As previously mentioned, consider including a portion of each department’s employees in several deployment rings.

In other words – mitigate the risk of issues by deploying updates to small groups of users across your organisation’s different groups, seeing if there are issues, and then rolling out to the majority of users after that.

Educational Contexts For Feature Updates:

Many K-12 and H.Ed institutes do not want changes to devices happening during the school term or semester where any new changes introduced by Feature Updates has the potential to confuse students/educators or unlock new apps/services that the school has not had a chance to test yet.

In fact, in the older approach of creating a “gold image” for devices, they were largely untouched for an entire academic year to prevent changes from occurring. With the flexibility that Modern Management of Windows 10 brings, it’s important for school IT administrators to think carefully about how to introduce Feature Updates.

For Windows as a service, maintenance is ongoing and iterative

Microsoft Intune and Endpoint Manager gives the required control and options to achieve any outcome – the key documentation is here.

Windows 10 Feature Update Options:

There are really three options for an IT Administrator to consider:

  1. Upgrade – this would see the significant Feature Update rolled out to devices based on the current Rings policy in place, with the device updating to the latest Feature Update as soon as Microsoft makes it available.
    1. Pros: End users get the latest feature updates they may have been waiting for, it’s likely to have better performance, be more stable and feature rich.
    2. Cons: the update will be sizable (usually well over 1GB) so bandwidth and device storage considerations need to be factored in. Additionally, changes may be confusing for some users.
  2. Delay – Up until recently, an IT Administrator could choose to delay the roll out of Feature Updates, as per the documentation here. They can specify the number of days for which Feature Updates are deferred. This period is in addition to any deferral period that is part of the service channel you select. The deferral period begins when the policy is received by the device (supported deferral period: Windows version 1709 and later – 0 to 365 days Windows version 1703 – 0 to 180 days)
    1. Pros: An IT Administrator can have some confidence that the major Feature Update won’t kick off in the middle of a school day, potentially impacting the availability of the device for learning; they could delay for up to a year
    2. Cons: It was only ever going to be a delay – in other words, the Feature Update was going to happen at some point. Also, it was necessary for the IT Admin to calculate (in days!) when a good period would be e.g. during Semester Break and “count back” to understand how many days to defer it
  3. Freeze – This is new and currently in Public Preview – see documentation here. With Windows 10 feature updates, you select the Windows feature version that you want devices to remain at, like Windows 10 version 1903 or version 1909. You can set a feature level of 1803 or later. Once set, the device will continue to receive Security and Quality updates as normal, but will be immune from Feature Updates.
    1. Pros: Very clear control over the Feature Updates – you can set the freeze and not have to think about calculating days when the Feature Update will arrive (like with Delay), when you’re ready to roll it out, simply update your policy.
    2. Cons: IT Admins may become ‘lazy’ and choose not to roll out new Feature Updates at all, preferring stability over the new features released in subsequent Feature Updates. This will slow adoption and uptake amongst users.

Considerations:

In my experience, few educational institutes take the same approach to managing devices, therefore the ability to choose how the major Feature Updates are distributed to devices is a good thing. There are some prerequisites for this new policy to work:

  • Devices must be enrolled in Intune MDM and Azure AD joined or Azure AD registered.
  • To use the Feature Updates policy with Intune, devices must have telemetry turned on, with a minimum setting of Basic. Telemetry is configured under Reporting and Telemetry as part of a Device Restriction policy.
    • This is under review as the product moves towards General Availability, but for now, in Public Preview, telemetry reporting is required.

Getting Started:

If you want to give this a go immediately, following the steps in the documentation is pretty simple:

Create and assign Windows 10 feature updates

  1. Sign in to the Microsoft Endpoint Manager Admin Center.
  2. Select Devices > Windows > Windows 10 Feature updates > Create.
  3. Under Basics, specify a name, a description (optional), and for Feature update to deploy, select the version of Windows with the feature set you want, and then select Next.
  4. Under Assignments, choose + Select groups to include and then assign the feature update deployment to one or more groups. Select Next to continue.
  5. Under Review + create, review the settings and select Create when ready to save the Windows 10 feature updates policy.

Final Thoughts:

Windows 10 should be thought about as an “ever green” operating system – applying updates regularly is a better approach to adoption of new features than leaving years between updates. In my experience, organisations that progressively release new versions see a less jarring experience for their end users with the smaller, more frequent changes, compared to those that have leaped many versions in one go.

Perhaps the most dramatic examples were those organisations that perceived they were “stuck” on Windows XP or Windows 7 (both end of life now) because of some software they used, being forced to make the leap to Windows 10. The user interface changes that occurred with Windows 8, 8.1 and the early versions of Windows 10 were significant, and many end users found the changes hard to adapt to.

Consequently, taking a more measured approach to regular updates is recommended and now with Feature Updates Freeze, IT Administrators have an additional option to manage change. For educational institutes, this is really helpful, my caution is always to not become ‘lazy’ and settle on a particular version and not upgrade from there. For devices that really should not change regularly, e.g. where there is no internet connection or where stability is prized above all else (such as managing medical equipment), the Long Term Servicing Channel should be considered – see documentation here.

For another good review of this new feature around freezing Feature Updates, check out this helpful blog here.

Categories
Microsoft365 Windows 11

White Glove Windows 10 Devices in Education With AutoPilot

I’ve written previously about solutions for streamlining the deployment of Windows 10 in Education using AutoPilot – check it out here. Today I saw that there is now a dedicated White Glove experience using AutoPilot that offers further improvements in this space and leverages new functionality available in Windows 10 1903:

You can read the full documentation on how to configure this here.

How Does It Work?

The idea behind the White Glove service is that IT Partners can add value by pre-loading the larger applications and device configuration settings before the device ends up in the hands of the user. From an education context, think of this in terms of a reseller adding value by provisioning the school’s preferred applications and settings on the device before shipping it to the student or teacher, who then complete the configuration by entering their AzureAD credentials. Visually, it’s like this:

whiteglove.png

With Windows Autopilot for White Glove deployment, the provisioning process is split. The time-consuming portions are performed by IT, partners, or OEMs. The end user simply completes a few necessary settings and polices and then they can begin using their device.

What’s Required?

There are some pre-requisites that will mean this is not suitable for every deployment at this stage. Note:

In addition to Windows Autopilot requirements, Windows Autopilot for White Glove deployment adds the following:

  • Windows 10, version 1903 or later is required.
  • An Intune subscription.
  • Physical devices that support TPM 2.0 and device attestation; virtual machines are not supported. The White Glove provisioning process leverages Windows Autopilot self-deploying capabilities, hence the TPM 2.0 requirements.
  • Physical devices with Ethernet connectivity; Wi-fi connectivity is not supported due to the requirement to choose a language, locale, and keyboard to make that Wi-fi connection; doing that in a pre-provisioning process could prevent the user from choosing their own language, locale, and keyboard when they receive the device.

I actually came across this earlier today when working with a partner who was interested in AutoPilot and I saw the “new” (to me) White Glove option:


There are also two stages to the deployment in this technique and again, I encourage you to read the full documentation here, but essentially:

whiteglove2.png

The option inside of Intune when configuring an AutoPilot profile for White Glove installations.

There are also two stages to the deployment in this technique and again, I encourage you to read the full documentation here, but essentially:

  • The Technician: configures AutoPilot settings inside of Intune to deliver the correct applications and settings to the device and then boots a 1903 OS installed Win10 device and hits the “Windows Key” 5x to launch the White Glove menu which kickcs off the AutoPilot deployment. Note: the device must be connected via an ethernet internet connection (Wifi will not suffice). At the completion of the setup, AutoPilot will display a QR code allowing the technician to make any change sif required (e.g. assigning the device to a different user at the last minute – an app is provided on GitHub to support this). Once this is completed, the device is re-boxed and shipped to the end user.
  • The End User (Student/Teacher):  After un-packaging the device, they choose their locale and connect the device to a Wifi network at which point they will be presented with a company/school branded screen and, if assigned to them specifically, their username pre-populated and simply requesting their password. Once this is entered, any final configuration is completed but generally at a far quicker speed than deploying all large apps that were taken care of by the White Glove experience with AutoPilot.

My Thoughts:

This is a pretty cool way of deploying devices and allows opportunities for the OEM/Reseller to add value to the delivery chain by pre-configuring devices with the necessary applications to start school, along with the prerequisite network settings so the device simply connects once on the school grounds.

At this stage, with 1903 still relatively new, not every device is going to be suitable for this option but I can see this becoming more mainstream over the coming twelve months. Whether it be a school wanting to easily deploy and drop ship new teacher laptops to them, or using a partner who can pre-provision Windows 10 for student BYOD device use, this method will certainly allow new options to deliver a stellar experience.

Categories
Microsoft365 Windows 11

When To Use Intune For Education vs Full Intune Standalone

EMS-edu-inforgraphic-1024x699.png

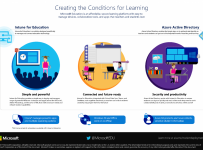
I get asked regularly by schools about which version of Intune they should be using when managing devices in their school: Intune for Education or the full version of Intune standalone. It’s a worthwhile question given the products sound so similar and towards the end of 2017 Ari Schorr wrote a good blog post answering this question:

Read Ari’s full blog post here.

He references a whitepaper that is good for education partners to read called “The state of modern device deployment in education” but when it comes down to which version of Intune to use I generally ask the following questions:

  1. Are you only going to be managing Windows10 Devices?
    1. Yes? Use Intune for Education
    2. No? Use full Intune for multi-OS management
  2. Will teachers and other less technical people be wanting to manage settings and push applications?
    1. Yes? Use Intune for Education if possible (see above re: Win10) as the interface is simplified and very easy for non-technical people to use.
    2. No? Use either, if you’re more comfortable with a large amount of settings and configuration options then the full version of Intune will be more valuable.
  3. Do you have advanced configuration settings and policies you want to configure on the devices you’re managing (i.e. replicating Group Policy).
    1. Yes? Use the full version of Intune standalone as this has significantly more settings and options
    2. No? Use Intune for Education if dealing only with Windows 10.

Remember, the important thing to get this working is to use AzureAD as your underlying identity management. You can get a lot of assistance from the Microsoft Education Documentation and Resources link. Specifically:

I hope this helps with your decision making process around which version of Intune to use in your school but if you have further questions drop them in the comments section below and I’m happy to answer them.

Categories
Windows 11

Rapidly Deploying Windows 10 Devices Via Modern Deployment Methods

One of the cool things in my job is that I get to see a lot of new devices and over the last few months I’ve been spending quite a bit of time figuring out the best way to deploy these in an educational context. I shared the guest blog around Modern Deployment Methods a few weeks back and I thought in this post I would outline some of my learnings from using some of the new Microsoft Education Solutions.

Devices I’ve Been Testing On:

The main devices I have been testing on are:

What is really pleasing about all of the above “hero” spec devices is that they all run a minimum of 4GB RAM and 64GB SSD storage making them powerful enough for most classroom uses and with new features coming like OneDrive Files on Demand, cloud storage will make them even more useful.

I’ve also had a look at the new Surface Laptop running Windows 10S but have not been able to do any extensive testing or resetting on with this device.

Modern Deployment Tools:

microsoft-tries-expelling-chromebooks-from-schools-with-intune-app-and-low-cost-pcs
Intune for Education dashboard.

Firstly, if you’re interested in setting up the full Microsoft Cloud Education Solutions then you really need to read this blog post first, where I’ve collated the key videos and “how to” articles. I’m going to outline the two key tools that make the deployment of Windows 10 super easy and these are:

Through my testing I’ve been using a few temporary demo tenants (check here to set one up if you’re a partner) and I’ve sometimes used Student Data Sync, and other times not. I have reset my above test devices numerous times using the Recovery Options in Windows 10 – if you’re not confident doing this, then the LaptopMag have created a pretty helpful guide here.

The idea behind the above tools is to take a cloud-first mentality in terms of pushing applications to devices and leveraging AzureAD as the key cloud identity platform.

Sequence For Setup:

This is the key sequence for setup in a simple list format:

  1. Reset Windows 10 to factory (see above) or use a brand new device.
  2. Insert a USB key with the Set Up School PCs App configured on it. This will:
    1. Install the initial provisioning package
    2. Install a selection of pre-selected applications
    3. Join the device to AzureAD of the pre-selected Office 365 Tenant.
    4. Enroll the device into Intune of the pre-selected Office 365 Tenant.
  3. Sign in as an Office365 user (this could be a student, teacher or ICT administrator)
  4. Intune (or Intune for Education) will start to push the remaining required apps and settings to the device immediately.
    1. In my testing I’ve settled on pushing apps to the device rather than to the user to ensure the fastest possible login times for students/staff i.e. once the application has been installed on the device it will be available to all users.
intune-for-education-set-up-pcs-100705444-large
The Set Up School PC App (SUSPC App) start screen.

In my testing, with the above mentioned test devices, I have found that steps 2-3 above typically takes under 5minutes. The initial login for a new user takes around 20-30seconds, and then subsequent logins of the same user is consistently under 4 seconds.

Step 4 above depends on how many applications you wish to push to the device, how fast the wireless network is etc. I am very confident that I could use the above sequence and deploy brand new devices to playing Minecraft:Education Edition on multiple devices in under 15 minutes.

Guides & Resources:

Learning more about the Set Up School PCs App can be done here but if you watch the below video you will see how easy it is:

The SUSPC App makes it super simple and fast to quickly deploy new (or restored Windows 10) devices and have them connected to your cloud first environment. It also means that the user experience for signing into these devices is fast and remains fast over time.

The second component to complete the deployment of apps and settings (sometimes referred to as policy) is using Intune For Education and you should look here for the full guide or watch the 5 minute video below:

As I mentioned in the sequence for setup at stage 4.1 above, I’ve settled on pushing apps directly to the device rather than to individual users, based on my preference that the apps are available to all users immediately when they sign in. This will, of course, vary from school to school based on how many apps they want on the devices (and available storage space) as well as app licensing considerations or suitability. The good news is that Student Data Sync will give you the granular control of which students (or classes, or year levels) you want to push certain apps or settings to.

If you’re after help or support directly from Microsoft around configuring Student Data Sync (SDS) for your school then complete the request form for personalised support HERE.

Conclusion:

These new tools, combined with new education focused devices from hardware partners, showcases just how far Microsoft has come in terms of delivering smarter and more efficient ways for schools to manage their ICT infrastructure. This is, of course, enabled through the power of the cloud and if your school is not leveraging a cloud identity platform like AzureAD it’s definitely time to explore this as an option.

Pleasingly, the above set up makes it easy for schools to have quick and reliable Windows 10 to focus on promoting great teaching and learning outcomes for students and teachers alike. Technology is a great servant to pedagogy, and with modern deployment methods like the above, less time is required to get the ICT equipment up and running, allowing more time for quality teaching and that has to be a good thing.

Categories
Windows 11

Microsoft Education Cloud Solution: End To End Guide For Deployment

microsoft_education_it_getstarted_workflow.png

2017 has been the year that has seen the various pieces of Microsoft’s Education offerings come together in a more cohesive, end-to-end offering that can now be deployed very easily by schools or their ICT partners.

Naturally, this is centered around Office365 and the power of the Azure cloud identity with Azure Active Directory, combined with the recent Creators Updates in Windows 10 providing a great overall solution for educators and students alike.

To the make the process of deploying this even easier, Microsoft have released a great step by step guide, with accompanying videos. The overview article, and the best place to start if you’re new to all of this, can be found at the following link:

Deploy & manage a full cloud IT solution with Microsoft Education

What is Microsoft Education?

Microsoft Education consists of these new and existing services and tools from Microsoft:

  • Microsoft Intune for Education for simple set up, control, and management of the resources for your school including apps, devices, and settings
  • Office 365 for Education provides online apps for work from anywhere and desktop apps for advanced functionality, built for working together and available across devices, and it’s free for schools, teachers, and students
    • School Data Sync to help automate the process for importing and integrating School Information System (SIS) data that you can use with Office 365
    • OneNote Class Notebook to organize course content, create and deliver interactive lessons to some or all students, collaborate and provide private feedback to individual students, and connect with major LMS and SIS partners for assignment workflow
  • Microsoft Teams to bring conversations, content, and apps together in one place and create collaborate classrooms, connect in professional learning communities, and communicate with school staff
  • Learning Tools are moving beyond the OneNote desktop app and is now available in Office Lens, OneNote Online, Word Online, and Word desktop
  • Whiteboard to create interactive lessons on the big screen, share and collaborate real-time by connecting to Class Notebook and Classroom
  • Windows 10, version 1703 (Creators Update) which brings 3D for everyone and other new and updated Windows features
  • Minecraft: Education Edition which provides an open and immersive environment to promote creativity, collaboration, and problem-solving

I’ve collated the following video guides from the individual instruction pages which are all worth checking out, with the goal of having a “one stop shop” for school IT admins to be able source all the help they need to deploy and maintain Microsoft Education.

In the following walkthrough videos, we’ll show you the basics on how to:

  • Acquire an Office 365 for Education tenant, if you don’t already have one
  • Import school, student, teacher, and class data using School Data Sync (SDS)
  • Deploy Microsoft Teams to enable groups and teams in your school to communicate and collaborate
  • Manage apps and settings deployment with Intune for Education
  • Acquire additional apps in Microsoft Store for Education
  • Use the Set up School PCs app to quickly set up and provision your Windows 10 education devices
  • Log in and use the devices

So, let’s get started with the setup process!

Set Up An Office365 Education Tenant

(full instructions here)

Use School Data Sync To Import Data

(full instructions here)

Enable Microsoft Teams For Your School

(full instructions here)

There is no video for this one, but the step by step instructions on the link above are very easy to follow along with.

Configure Microsoft Store For Education

(full instructions here)

Use Intune For Education To Manage Groups, Apps, and Settings

(full instructions here)

Set Up Windows 10 Education Devices

(full instructions here)

There is no video for this one either, however the above link shows you how to use the free Set Up School PCs App to quickly deploy new devices and join them to Azure Active Directory (AAD) – this process usually takes less than 5mins for a brand new device out of the box.

Finish Windows 10 Device Setup & Other Tasks

(full instructions here)

Conclusion

It’s now easier than ever before to quickly set up a feature rich educational environment using the Microsoft cloud offerings of Office365 combined with Windows 10 devices.

I hope the above guides help but if you have further questions, drop them in the comments section below.

Categories
Windows 11

Tools To Support Deployment of Windows 10 & Secure Assessment

windows-10-educationFrom my experience working in schools over the last decade, there are two common challenges faced by teachers and support staff:

  • Quickly configuring and deploying school computers
  • Securely managing online assessment with devices

Schools are constantly looking for new ways to streamline the setup and deployment of computers in their environment and there is a huge variety of methodologies to achieve this. Some can be scaled more effectively than others, however these often require considerable ICT skills to achieve. Similarly, to be able to lock down devices to reduce the chance of cheating during assessment is not as easy as it sounds.

With Windows 10, Microsoft have released a number of tools to assist schools with these problems. Firstly, here is an overview of the wider features from Microsoft in Education:

Set Up School PCs App:

This app is designed to make it easy for non-technical teaching staff to easily configure and deploy Windows 10 to new computers, using nothing more than a USB Key. Instructions on how to do this can be seen here:

My Take: Whilst this is not as powerful as other tools available for imaging machines, it’s definitely a good starting point for schools to get standard configurations onto devices quickly. For newer, often cheaper, devices that do not have a network port on it, then this USB deployment method is cheap and efficient.

Take a Test App:

This app tackles the tricky situation faced by many schools: teachers want to use digital platforms for assessment but restrict access to content on the device or internet during the assessment period. With Windows 10, user accounts can now be configured to provide secure, locked down assessment conditions on the device to achieve fairness and parity during the assessment. See the following video for more information:

My Take: As more assessment is happening on devices, it makes sense to standardise on certain assessment conditions. In some situations it’s appropriate for it to be an “open book” test, where local files and resources can be accessed, along with the internet. However, in other situations you’re genuinely looking to assess student knowledge retention and, through Windows 10 and the Take a Test App, schools can ensure that both formative and summative assessment can be securely completed in an equal setting.

Windows 10 vs Competitor Devices:

It is features like the above, new in Windows 10, that offer increased value for schools. Many are now re-evaluating the role of competitor devices and the following link has a handy table comparing Windows 10 devices with other popular devices in schools:

Click here to see the feature comparison table.

The bottom line is Windows 10 equips students to do more with their devices through the use of powerful applications like Office 365, OneNote and Minecraft Education Edition. These rich, desktop applications, along with the browser based versions, provide a great platform to support learning outcomes for students.

Remember to check out the Microsoft Schools Agreement page with the Ministry of Education to see the full range of software available to schools.