Categories
Microsoft365

Using Conditional Access To Protect Student and Staff Identity With Location Based Policies

Overview of Conditional Access

This post was inspired by recent conversations with partners and IT Admins in schools who were wanting to provide a layer of additional protection for students without requiring them to use MFA (usually, because younger students do not always have access to mobile phones). 

It’s a lengthy post, however provides a good step by step overview on how to protect users from overseas identity attacks by blocking international authentication attempts through the use of Conditional Access without requiring MFA. The following sections are included:

  1. Why Identity Protection
  2. What is Conditional Access?
  3. How To
  4. Implications of this Approach
  5. Final Thoughts

Why Identity Protection?

Attempts by bad actors to exploit weak or compromised passwords is one of the most common attack vectors experienced by organizations globally and education is no exception. In fact, in a 2019 Microsoft Security blog it was noted:

There are over 300 million fraudulent sign-in attempts to our cloud services every day … MFA can block over 99.9 percent of account compromise attacks. With MFA, knowing or cracking the password won’t be enough to gain access. To learn more, read Your Pa$$word doesn’t matter. (source)

MFA, or Multi Factor Authentication, is a process whereby a second form of identification is required (usually a smartphone app or SMS code message) which works very effectively, however can be challenging or time consuming for some end users. This is particularly true in education where schools often have younger students who may not have a phone with which to perform the MFA action.

Whilst weak passwords can be relatively easily avoided by schools and universities by applying minimum password complexity rules, the reality is many users will leverage the same password in other online platforms (e.g. social media, fitness apps and other websites where they have created accounts) and it may be that those platforms have their user database compromised. In those circumstances, a good place to check is the website Have I Been Pwned? where simply entering your email address will reveal if your account has been compromised online. Having obtained compromised account details, would-be attackers can launch automated drive by attacks on many online platforms, including M365. MFA will go a long way towards stopping this, however Conditional Access is another tool available to M365 users that is effective even without MFA which may be unavailable due to age or skill of end users.

Given that the vast majority of attackers are likely to be attempting authentications from overseas, Conditional Access will allow you to automatically block those attempts, adding an invisible layer of protection to all users without slowing down the authentication process at all. I was talking to an IT partner recently who supports multiple schools and he commented:

[Conditional Access is a] quick easy way to stop 99% of our student accounts getting compromised, probably staff as well… [other solutions] don’t have any product offerings outside of MFA … Conditional Access is a game-changer!”

What Is Conditional Access?

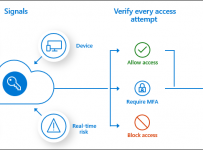
conditional-access-signal-decision-enforcement

Conditional Access policies at their simplest are if-then statements, if a user wants to access a resource, then they must complete an action. (source)

As part of Microsoft’s security approach based on Zero Trust, Conditional Access provides an excellent set of tools to the IT Administrator to allow employees or students and teachers the ability to carry out necessary tasks and actions, whilst ensuring security policy is applied with the least imposition possible.

Conditional Access uses a few terms interchangeably, so for clarity sake keep the following three ideas in your mind:

  • A Condition needs to be met. This is the “if” statement and is made up of common signals. Common examples of conditions or if statements include
    • User or group membership; IP location information (i.e. where the end user is connecting to the internet from); Device (e.g. OS or device state); Application (e.g. using authorized apps only); as well as advanced 1st Party Microsoft Identity Protection Tools such as Microsoft Cloud App Security (MCAS)
  • A Decision is made to Grant access to a resource (or, alternatively, block it) based on the Condition / if statement. This is the “then” statement completed for each Condition. Common decisions include:
    • Block access (clearly the most restrictive decision); Grant Access with optional additional layers required such as MFA, only from compliant or hybrid AAD joined device or from an approved app only (e.g. official Outlook app for iOS and not the native Mail client).
  • Like all policies in M365, a Conditional Access policy must be Assigned to a valid user/group or users/groups before it becomes effective.

Common examples of Conditional Access policies used by organizations include:

  • Requiring multi-factor authentication for users with administrative roles
  • Requiring multi-factor authentication for Azure management tasks
  • Blocking sign-ins for users attempting to use legacy authentication protocols
  • Requiring trusted locations for Azure Multi-Factor Authentication registration
  • Blocking or granting access from specific locations
  • Blocking risky sign-in behaviors
  • Requiring organization-managed devices for specific applications

How To

There are a bunch of great tutorials out there (this is a super simple one to follow) and the official documentation is always highly recommended to read, but if you want to follow my steps then read on. In this example I will be setting up a Conditional Access policy to block all authentications from outside New Zealand, but allowing any internal authentications to process without requiring MFA. A policy like this, tweaked for your location, would provide the additional layer of protection for your accounts without adding any additional steps for your end users.

  • Start at the AzureAD Admin Centre (accessible via the M365 Admin Centre menu options) and scroll down to locate the Security menu

1

  • Create a Named Location where you will define your Country IP address range

2

Which should look like this:

3

This will be important as Conditional Access Policies will be relying on Named Locations that you’ve created. You can also define specific IP address ranges rather than entire countries if you choose.

  • It’s now time to create your Conditional Access Policy and use the Named Location you created above. In the blade menu choose Conditional Access:

3-1

  • Then look to create a new Policy:

4

When creating a Conditional Access Policy there are three steps you need to always consider:

  • What’s the Condition that needs to be met? (the If statement)
  • What access will you Grant? (the Then statement)
  • Which Users and/or Groups will you Assign the policy to?

Setting up the Condition to block all logins but to exclude your named location(s) such as New Zealand in my location requires two steps. First, include Any Location:

5

And then exclude the Named Location you created:

6

  • With your Condition defined, you now need to Grant the access you want associated with this policy:

7

In this example I have chosen to simply “Block Access” – remember, this will now apply to all locations I “Included” in the above Condition (which was ‘anywhere’) but critically will exclude the Named Locations I selected – New Zealand. In effect, this means that any attempt to sign into M365 outside of New Zealand will be blocked immediately. You’ll note there are other good options to consider such as enforcing Multi Factor Authentication (MFA) and more advanced options such as ensuring that the device is compliant from a security posture assessment.

  • The final step to complete setting this up is to Assign the new policy – this process follows the standard M365 Administrative workflow of selecting a user(s) or group(s)

8

It’s worth noting that you can set the policy to “Report-only” – this is a great thing to do initially when testing to ensure that you’re not locking yourself out of your tenant! Assign the policy and then monitor the impact

  • To Monitor the sign-in activity and check the impact of your Conditional Access Policy, return to the main AzureAD Admin Portal and under the “Monitoring” section of the menu you’ll see “Sign-ins” which should look something like this:

10

From an end user perspective, they would receive a message like this:

10-1

Implications Of This Approach

Multi Factor Authentication (MFA) is obviously one of the best ways to protect accounts, however the above example shows that a simple Conditional Access policy can go a long way towards protecting student and teacher accounts without negatively impacting their authentication sign in process. This can be used effectively in situations where end users do not have any means of completing MFA (such as, no mobile phone or access to a fixed landline to receive an automated MFA call).

The power of Conditional Access is that it can still be used in conjunction with MFA, as it could easily be tweaked to allow a teacher or student travelling overseas to still log into M365 but they would necessarily be prompted for MFA to ensure the integrity of their authentication.

For those educational institutes looking to provide the maximum level of protection around their accounts they should consider AzureAD Identity Protection which works by collating and analyzing many signals and making automated decisions based on the risk profile of the sign-in attempt.

Identity Protection uses the learnings Microsoft has acquired from their position in organizations with Azure AD, the consumer space with Microsoft Accounts, and in gaming with Xbox to protect your users. Microsoft analyses 6.5 trillion signals per day to identify and protect customers from threats.

The signals generated by and fed to Identity Protection, can be further fed into tools like Conditional Access to make access decisions, or fed back to a security information and event management (SIEM) tool for further investigation based on your organization’s enforced policies. (source)

With Identity Protection, the following risk classifications are analyzed:

RISK DETECTION AND REMEDIATION

Risk detection type

Description

Atypical travel

Sign in from an atypical location based on the user’s recent sign-ins.

Anonymous IP address

Sign in from an anonymous IP address (for example: Tor browser, anonymizer VPNs).

Unfamiliar sign-in properties

Sign in with properties we’ve not seen recently for the given user.

Malware linked IP address

Sign in from a malware linked IP address.

Leaked Credentials

This risk detection indicates that the user’s valid credentials have been leaked.

Password spray

Indicates that multiple usernames are being attacked using common passwords in a unified brute force manner.

Azure AD threat intelligence

Microsoft’s internal and external threat intelligence sources have identified a known attack pattern.

The “Atypical Travel” is an interesting one that I’ve encountered given my work across Asia – I’ll be prompted for MFA when signing in at locations I rarely travel to.

Identity Protection then creates three levels of risk:

  1. Low
  2. Medium
  3. High

A smart approach for schools and universities would be to automatically block Medium and High risk sign in attempts and in doing so, significantly bolstering their security posture when it comes to Identity Protection.

Final Thoughts

There are many ways organisations can add additional layers of protection to the authentication process to reduce the chance their users are compromised and the potential of serious damage is limited. There is always a balance between security and inconvenience (which risks non-adherence from end users), and therefore the beauty and power of Conditional Access should be very appealing to IT Administrators in schools and universities. Of course, Multi Factor Authentication (MFA) and AzureAD Identity Protection provide some of the highest levels of protection possible, but I would personally strongly encourage every organization to start with Conditional Access based on location and blocking overseas authentication attempts.

If you’ve got other strategies for protecting your users’ accounts, drop them in the comments below.

Categories
Microsoft365 Windows 11

Guest Posts: The Future Is Password-less & Intune For The Win!

In previous blog posts I’ve made, I’ve been quick to redirect readers to other’s blogs when I see an awesome post that covers a topic I’m interested in really effectively. Today is no different, except that I’m going to share with you two posts at the same time.

Identity.PNG

Enable Password-less Sign In With Security Keys

Original Post Here

A month or two ago a colleague showed me signing into the online Office Portal using a Yubikey – what intrigued me was not just no need to enter a password, but no need to enter a username. From this, I quickly obtained my own Yubikey, set up a demo environment and ended up demonstrating this during a presentation on Data Privacy and Security Considerations at the Independent Schools of New Zealand Annual Conference..

As I was getting on a plane this week I read Peter van der Woude’s latest post on using this technology to go a step further: signing into a Windows 10 1903 machine with a Yubikey but also managing all of this via Intune (additional information here):

If you’ve never used a Yubikey before, you essentially configure them with account credentials, which could be anything from your AzureAD username/password, through to your social media or other cloud services accounts, protect the key with a local PIN and/or biometric and you’re done. When you’ve configured a service, such as Twitter, to use your Yubikey, you’re prompted to insert the key into the device to authenticate, unlock it with your PIN and/or biometric, and the authentication is completed. The important point is you’ve never entered your username and/or password.

People often ask me, why is a PIN more secure than a password? Well, I’d suggest you read this article from The Verge, but perhaps more importantly, this documentation from Microsoft,  which goes into detail on the following reasons:

Why is a PIN more secure than a password?

  1. PIN is tied to the device: That PIN is useless to anyone without that specific hardware. Someone who steals your password can sign in to your account from anywhere, but if they steal your PIN, they’d have to steal your physical device too!
  2. PIN is local to the device: A password is transmitted to the server — it can be intercepted in transmission or stolen from a server. A PIN is local to the device — it isn’t transmitted anywhere and it isn’t stored on the server.
  3. PIN is backed by hardware: The Hello PIN is backed by a Trusted Platform Module (TPM) chip, which is a secure crypto-processor that is designed to carry out cryptographic operations. The chip includes multiple physical security mechanisms to make it tamper resistant.
  4. PIN can be complex if enforced by the organisation: You can require or block: special characters, uppercase characters, lowercase characters, and digits.

Why does this matter for education?

The ISNZ conference I presented at had a theme of “The Future of Talent” and all educational institutes need to be thinking about how they’re preparing students for the workforce, and this includes actively teaching and modelling good digital citizenship when it comes to security. Of course, this extends to parents as well: my eldest daughter signed up for Instagram this week and the first action I required of her was to set up multi factor authentication.

In many K-12 and Higher Education institutes, students use shared devices and routinely enter their passwords. A Yubikey would both simplify and secure this approach. Similarly, for younger students who often find it difficult to remember a username and password combination, using a Yubikey and remembering only a PIN could be a more effective approach.

I’ve been advising customers that MFA should be seen as a requirement for any senior leadership staff, HR, Finance and those dealing with pastoral care records in education, but to further protect their identity credentials using something like a Yubikey would be a sensible approach, especially given the relatively low cost of the keys and the ability to use them across almost all online services now. I have configured my Yubikey as an authentication mechanism for:

  • AzureAD
  • Microsoft Account
  • Google Account
  • Twitter
  • LinkedIn
  • DropBox
  • WordPress

If you’re not doing MFA or would like to know more about a password-less future then read Peter’s blog and talk to your local IT Team or Partner.

User Interactive Win32 Intune App Deployment with PSAppDeployToolkit

The second guest blog post I’d like to call out today is from Stefan van der Busse and show cases his great work extending some of the advanced Win32 app deployment features of Intune and combining it with User Interaction to deliver a really slick customer experience.

Original Blog Post Here

Stefan’s blog post, like Peter’s, is aimed at the IT Admin, but it is focused very much on improving the end user experience by prompting them when an application is going to be installed or upgraded, giving them the option to defer the process or requiring them to quit active or dependent applications before the install can proceed:

Win32PSApp3

To see it in action watch this YouTube video:

Stefan explains why this is important in his blog:

How can we provide end users whose devices are managed with Microsoft Intune (Standalone) with a better installation experience, for high user applications while not relying on them to self serve application updates using the Company Portal?

Services like this have previously been available through on premise tools such as SCCM, however the solution presented by Stefan via Intune ‘un-tethers’ the end user from the workplace, meaning these updates and installs can take place anywhere the device is connected to the internet. Education, like most other verticals, has an increasingly mobile workforce and customer base (students), so the ability to deploy apps ‘any time, anywhere’ is only going to grow.

Again, I encourage you to read Stefan’s original blog post here.

My Final Thoughts:

If you’ve not picked up on it already, I’m a big fan of Intune as an MDM for managing Windows10 in a modern way, and the two guest blogs I’ve shared today show innovative ways to improving the security and app deployment processes for organisations.

For educational institutes, who increasingly hold and manage hyper-sensitive information on students and staff, taking steps towards MFA and a password-less future is critical, and is a responsible approach to modelling good Digital Citizenship to both employees and students.

Similarly, adopting modern, cloud-first approaches to device management and app deployment will reduce costs for educational institutes whilst increasing flexibility in terms of not requiring IT Services to physically touch every device or have it on the local area network.

Lastly, I’m grateful to all those bloggers out there that write incredible posts that I can reference from my blog! Thank you!

Categories
Microsoft365 Windows 11

Webinar: Moving A School To The Cloud With M365 Education

Technology is a great servant of pedagogy

imagesToday I hosted a webinar with Aaron Overington, the IT Manager at Oneschool Global NZ and we discussed his two year journey of moving the IT infrastructure he manages into the cloud. He achieved much of this using the solutions inside the Microsoft 365 Education suite and he went into detail around the planning, objections raised (and countered!), proof of concepts and ultimately the delivery and completion of this project.

I started this blog post with the quote above because, whilst there is a lot of technical discussion in this webinar, if you listen closely to Aaron talking you hear that his driving motivation is to ensure he contributes towards the best possible learning environment for the teachers and students of Oneschool Global NZ, that will result in the highest learning outcomes possible. It’s very important, in my mind, not to lose sight of that outcome because when done well, technology should fade into the background of effective learning scenarios.

This digital transformation journey took Aaron and his team approximately two years from the genesis of his vision through to the completion of the execution and included the powering down of all the on-premise servers across the multiple campuses he supported throughout New Zealand in January 2019:

LinkedIn - Project Done!

Webinar Recording:

We recorded the webinar using Microsoft Teams (I forgot to hit record so missed the first minutes!) and you can watch it here:

Some Key Points Of Interest:

The following points are time stamped – click the link that interests you and it will launch in YouTube on that topic.

Slide Deck From Webinar:

Aaron kindly agreed to share his deck from the session and you can view this below:

My Point of View:

I’m hugely grateful to Aaron and the team at Oneschool Global NZ for sharing their journey on this webinar and allowing the recording and deck to be shared after the event as well.  Oneschool Global NZ has a reasonably unique set of requirements in terms of close management of applications, content and network filtering for users across a geographically diverse set of campuses. Through the use of M365 Education Aaron was able to move the school’s IT infrastructure completely to the cloud and keep it integrated with their cloud LMS (Canvas), video conferencing solution (Zoom) and cloud Student Management System (Edge Learning Solutions).

In completing this project, Aaron was able to achieve significant cost and resource savings for the school and deliver a more efficient platform to drive teaching and learning outcomes for the teachers to leverage and the students to benefit from.

Ultimately, this is the key message from this story in my view: technology remains a great servant to pedagogy and, when deployed effectively, can truly accelerate the digital transformation of an organisation.

Categories
Microsoft365

Technical Post: Provisioning AzureAD Users Into G Suite Org Units

banner.pngI’ve been working with Stefan van der Busse (suggest you follow him on Twitter) for a couple of years now and have learnt heaps from him in various aspects of the Enterprise Mobility and Security (EMS) Suite, where he has a lot of experience and crafted some great solutions.

I’m really pleased to see he has started a new blog and, in true geeky style, has chosen GitHub as the hosting platform.

Check his blog out here

He’s kicked off the inaugural post with a topic that we’ve exchanged ideas and knowledge over recently – how to sync AzureAD users into specific Organisational Units (OU) inside of G Suite. You can see this post here.

It’s an important read because it deals with an increasingly common situation: a customer that has no on premise identity platform anymore and wants to do Single Sign On and user synchronization between the AzureAD and Google identity clouds.

The Value of Experience & Testing

One of the many benefits you’re likely to get from Stefan’s blogs is the culmination of his experience and extensive testing and this comes through in the very first post he’s released – finding a probable bug when users are moved between departments or business units in AzureAD, this sync is not acknowledged at the G Suite end. In his words:

A word of warning

This is a great solution for getting users provisioned into G. Suite and into their initially correct OU. But through rather extensive testing and going back and forth with Azure AD support, there’s a major caveat that they don’t mention in any of the support articles.

All provisioning requests that are sent to G. Suite use a POST REST method. This is generally fine; and works perfectly for user creation. But as per the G. Suite Admin Directory API documentation updates to existing users need to use a PUT REST method.

So what does that mean?

Any subsequent changes such as a user moving between departments or business units could result in a user moving between assigned groups, and therefore needing to be moved to a different OU in G. Suite.

The change is sent to G. Suite by Azure AD but simply and unfortunately ignored.

That knowledge is gold if you’re setting up a similar situation in your tenant/business and worth noting and planning around.

If you like what you’re seeing from this initial blog post, then suggest you subscribe to Stefan’s blog – you can do this here.

Categories
Microsoft365 Windows 11

Adventures With Microsoft AutoPilot On Education Shared Devices (Part 2)

Last week I posted Part 1 of this blog series, exploring how schools can automate the configuration and deployment of their shared devices using Microsoft AutoPilot and Intune. Again, if AutoPilot is new to you, then I encourage you to watch this very short video explaining how it works:

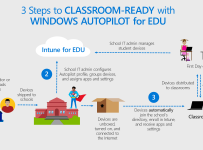
Since writing Part 1, I also found this great blog post specifically on this topic from January 2019 which included this helpful graphic:
Autopilot for Edu

Overview:

As this blog post will be a little longer (and more technical) I’m going to give you a break down of what is to come so you can skip to the important sections relevant to you:

  • Part One (read this blog post here):
    • Identity – why use a cloud identity?
    • Why use AutoPilot?
    • Configuring Autopilot
    • Enrolling your device
  • Part Two:
    • Intune vs Intune for Education
    • What are CSP?
    • Building a custom CSP Policy
    • Using LOB App Deployment in Intune

Now it’s worth stating at this stage that I am not an IT administrator by profession. Whilst I’m probably more technical than many, I’ve got the following working through a combination of relying on the detailed guides in the Microsoft Docs and awesome technical colleagues who have shared some of their expertise with me. Additionally, like you, I read a bunch of blogs to see how people have done this in the past. This blog is a small contribution to the community who like to learn from other’s experiences. If you’re reading this and are more technical than me and see some improvements or corrections in what I’ve done – I’d love to hear from you in the comments section below.

With that said, let’s get started!

Intune vs Intune for Education

Intune as a standalone Mobile Device Management (MDM) tool has been around for a long time, however Intune for Education was only launched in 2017.

A key point to clarify is that both versions use the same backend system to manage the configurations – Intune for Education is really just a simplified interface for educators to leverage. If you make a change in Intune for Education, it’s reflected in the equivalent settings inside of Intune (and vice versa).

I’ve written a more detailed blog about when to decide which version to use that you can read here however I commonly ask the following questions in helping schools decide which version to use:

  1. Are you only going to be managing Windows10 Devices?
    1. Yes? Use Intune for Education
    2. No? Use full Intune for multi-OS management
  2. Will teachers and other less technical people be wanting to manage settings and push applications?
    1. Yes? Use Intune for Education if possible (see above re: Win10) as the interface is simplified and very easy for non-technical people to use.
    2. No? Use either, if you’re more comfortable with a large amount of settings and configuration options then the full version of Intune will be more valuable.
  3. Do you have advanced configuration settings and policies you want to configure on the devices you’re managing (i.e. replicating Group Policy).
    1. Yes? Use the full version of Intune standalone as this has significantly more settings and options
    2. No? Use Intune for Education if dealing only with Windows 10.

Remember, the important thing to get this working is to use AzureAD as your underlying identity management. You can get a lot of assistance from the Microsoft Education Documentation and Resources link.

EMS-edu-inforgraphic-1024x699

It is worth pointing out that since Intune for Education was first released, new features have been added to it, including the ability to manage iPads in late 2018 – really helpful for schools that are wanting to develop a “single pane of glass” for configuring and deploying all their educational devices.

What Are CSP?

CSP stands for Configuration Service Providers and the best place to get started if you have no knowledge of this is here – CSP For Beginners.

A CSP is an interface in the client operating system between configuration settings specified in a provisioning document and configuration settings on the device. Their function is similar to that of Group Policy client-side extensions in that they provide an interface to read, set, modify, or delete configuration settings for a given feature. Typically, these settings map to registry keys, files or permissions. Some of these settings are configurable and some are read-only.

The reference to Group Policy client-side extensions above is important and useful because most IT Admins are familiar with these, and when you explain that CSP achieve the same outcome but are managed out of the cloud from an MDM like Intune, they generally get the concept quite quickly.

In essence, a CSP allows you to restrict/allow various functionality on an end device – in this case we will primarily be talking about Windows 10 – such as allowing the Edge web browser to make search recommendations. Some of these settings are enabled via the GUI inside of Intune, others need to be manually created with a Custom CSP Policy (read on below for an example). To return to the Edge search setting example, in Intune the policy to allow search suggestions in the Microsoft Edge address bar uses Browser/AllowSearchSuggestionsinAddressBar in the Policy CSP

edge browser policytocsp
The GUI inside of Intune on the left simply configures the CSP on the right to either 0 (not allowed) or 1 (allowed)

Once you understand the concept of what you can do with CSP and are ready to get your training wheels off, reading the full list of Policy CSP available here is a great starting point. In fact, because not all CSP are currently available in Intune’s GUI, you may find some advanced features that can only be deployed using the Custom CSP Policy (again, read on for a good example of this).

It’s worth noting that the full version of Intune has many capabilities to manage iOS devices, often requiring a custom Profile to be created and pushed to the iPad. I’ve written a five part blog series showing how you can do this on iPads that is worth reading here.

Building A Custom CSP Policy

I got tipped off by a friend who is far more technical than me to two CSP that exist in the Authentication section and are designed to speed up the initial login of Windows 10 devices in a shared environment like a school:

These are:

  • Enable Fast First Sign In
    • This policy is intended for use on Shared PCs to enable a quick first sign-in experience for a user. It works by automatically connecting new non-admin Azure Active Directory (Azure AD) accounts to the pre-configured candidate local accounts.
    • OMA-URI = Authentication/EnableFastFirstSignIn
  • Preferred AzureAD Tenant Domain Name
    • Specifies the preferred domain among available domains in the Azure AD tenant.

      Example: If your organization is using the “@contoso.com” tenant domain name, the policy value should be “contoso.com”. For the user “abby@constoso.com”, she would then be able to sign in using “abby” in the username field instead of “abby@contoso.com”.

    • OMA-URI = Authentication/PreferredAadTenantDomainName

Both of these require Windows10 Pro or above to work.

Both Intune and Intune for Education are rapidly adding new features into the GUI and, as indicated in Brad Anderson’s blog post above, Intune for Education recently added the Preferred AzureAD Tenant Domain Name feature to the GUI:

Preferred AAD Tenant Domain.PNG
Available in the Settings Blade, an IT admin can rapidly add this setting to Win10 devices now.

However, if you’re wanting to build a Custom CSP Policy for a setting that is not in the GUI yet, such as enabling Fast First Sign In, then the steps would be as follows:

1.PNG

2

3
Note in the main display you can see existing Profiles I’ve created already, including my example “Fast Signin and UPN Default”

  • The “Name” and “Description” Fields are entirely up to you, however make sure you choose “Windows 10 and later” for the Platform and, critically, you choose “Custom” for the “Profile Type”. On the left below is my configured policy, on the right is the options when creating a new one

  • Once you have a Profile created, you need to add settings to it so click “Add” – this is where you need the documentation to guide you for the correct CSP e.g. for Authentication CSP

5.PNG

  • Again, the “Name” and “Description” fields are largely up to you, but the critical fields are the “OMA-URI” and “Data Type” and “Value” fields are all going to be informed from the CSP documentation

6

Here are my completed examples:


7a
In this example the Data Type is a string, as I’m putting in my O365 tenant’s domain name. The full OMA-URI in this example is: ./Vendor/MSFT/Policy/Config/Authentication/PreferredAadTenantDomainName

7
In this example the Data Type is an Integer with “1” = on and “0” = off. The full OMA-URI in this example is: ./Vendor/MSFT/Policy/Config/Authentication/EnableFastFirstSignIn

  • With your custom CSP Policy created, you now need to assign this to devices under the “Assignments” Setting – in my example I’m applying it to All Devices:

8.PNG

At this point, you’re pretty much done and you can sync devices to ensure the policy is pushed to them. Reporting inside of Intune will advise you whether this has been successfully deployed to devices:

9

In my experience, applying the two policy settings for shared devices in education significantly improves the initial sign in experience in two ways:

  1. Fast First Sign In – does exactly what it’s name suggests, reducing the time considerably for a student to sign into a Windows 10 device for the first time
  2. Preferred AzureAD Tenant Domain Name – given many younger students are not great at typing, or remembering relatively complicated text like a school domain name, allowing them to simply type their username e.g. “sam.mcneill” or even “samm” (based on school username policy) reduces the complexity of the sign in process.
    1. If you’re after a creative way to help younger students remember ‘complex passwords’ then have a look at my blog post on this.

As you can see, you have very high levels of control over devices when you’re using CSP, either through the GUI in Intune itself, or via building custom CSP policies as I did above. If you want even more control, you can even explore using ADMX Templates inside of Intune.

Using LOB App Deployment in Intune

The last feature I’m going to show in here is a trick I learnt from David Kozera to speed up the access to shared applications for users when they first sign in.

Intune for Education initially allowed only apps inside of the Microsoft Store for Education to be deployed to devices, which was great if you were running Windows 10S, but less helpful if you had a need to install apps that were not inside the store. They did eventually add the ability to install .msi packages, and inside of the full version of Intune you can actually install quite a range of different application types, including the recent addition of Win32 apps.

Why is this important? Well, many schools I speak to want to use Intune to push out Minecraft: Education Edition to their student devices, and simply select the app in the MS Store for Education and deploy it using either version of Intune. This works flawlessly, but one of the downsides on a shared computer is that apps deployed from the Store deploy to the user rather than to the device. What this means in practice is when a user signs in for the first time to a shared device they do need to wait a few minutes for apps from the Store to appear on their device.

Using Intune to push Minecraft:EE as an LOB app, rather than a Store app, makes it instantly available to a student when they log into a shared device for the very first time. This means no waiting for apps to appear and no lost teaching time.

This is referenced in this document here.

Let’s get started:

LOB 1.PNG

  • Scroll down a little further and download the “Required Frameworks” file as well, as you’re going to need this in Intune shortly:

LOB 2.PNG

  • With the two files downloaded, you need to return to Intune and click on “Client Apps” and then “Apps”

LOB 3.PNG

  • You need to click “Add” to start building a new app – see below in my screenshot you can observe the different types of apps that I have available to deploy, and I’ve circled the Minecraft:EE Universal App (.appx) as a Line of Business app, as well as Chrome Browser as a .msi Line of Business App, compared to the standard Microsoft Store apps.

LOB 4.PNG

  • Make sure you choose a Line of Business App:

LOB 5.PNG

  • Upload the .aopx version of Minecraft and the dependency framework file you downloaded:

LOB 6.PNG

  • Configure the app information as it will appear to your users once installed on their device:

LOB 7

  • With this done, you can now assign the app for deployment based on your groups of devices – it will automatically install the first time and be instantly available for any user as soon as they sign into the device the first time.

Final Thoughts

Cloud Identity and Cloud MDM’s make the management of devices easier than ever. For schools, who often have limited funds and resources to manage devices, exploring AutoPilot and Intune for Education makes a lot of sense to simplify the management and deployment of devices, as well as reducing the need for on-premise servers for device provisioning.

As these services become even smarter, remote resets of devices and troubleshooting become easier as well. For many, however, their view of managing Windows is from many years ago and they simply do not have experience with Windows 10 and modern practices around deployment.

IF you’re interested in knowing more, reach out to me on Twitter or if you have your own tips for improving deployment in this way, drop a message in the comments below.

Categories
Microsoft365 Windows 11

Adventures With Microsoft AutoPilot On Education Shared Devices (Part 1)

In my job I chat a lot with both school leaders and IT admins about how they can simplify the management of their devices, making it faster and easier for their end users (usually students, teachers and admin staff) to get started and complete the work they need to do on a device.

Unlike many corporate environments, schools have a very high number of “shared devices” in operation, where students of different year levels require access on the same device and, in some scenarios, even teachers need to log into the same device and access different apps and security settings. In the next two blog posts I’m going to go a bit deeper into how schools can approach this challenge with modern deployment practices, leveraging cloud identity in AzureAD, easier enrollment of devices using Microsoft Autopilot and finally a couple of tweaks for a faster user sign-in experience using Microsoft Intune as the Mobile Device Management (MDM) tool.

Overview:

As this blog post will be a little longer (and more technical) I’m going to give you a break down of what is to come so you can skip to the important sections relevant to you:

  • Part One:
    • Identity – why use a cloud identity?
    • Why use AutoPilot?
    • Configuring Autopilot
    • Enrolling your device
  • Part Two: (click here to read)
    • Intune vs Intune for Education
    • What are CSP?
    • Building a custom CSP Policy
    • Using LOB App Deployment in Intune

Now it’s worth stating at this stage that I am not an IT administrator by profession. Whilst I’m probably more technical than many, I’ve got the following working through a combination of relying on the detailed guides in the Microsoft Docs and awesome technical colleagues who have shared some of their expertise with me. Additionally, like you, I read a bunch of blogs to see how people have done this in the past. This blog is a small contribution to the community who like to learn from other’s experiences. If you’re reading this and are more technical than me and see some improvements or corrections in what I’ve done – I’d love to hear from you in the comments section below.

With that said, let’s get started!

Identity – why use a cloud identity?

It’s amazing how many conversations I’ve been having around cloud identities recently as school leaders are starting to understand they need to be able to simplify user access to key resources via Single Sign On (SSO), and open up both cloud/internet solutions as well as traditional on-premise hosted solutions. There are plenty of confusing diagrams out there trying to explain what this is about – the following is the simplest I could find:

AzureAD.png

Essentially, the above is showing two scenarios:

  1. The user may sign into an “on-premise” identity platform (on the left), in this case Active Directory (still incredibly common in schools) which, through the use of a tool called AzureAD Connect can automatically sign into a cloud identity as well, in this case Azure Active Directory (AzureAD or even AAD).
  2. Alternatively, the user may sign directly into a cloud service (on the right) using their AzureAD credentials. In fact, if their device is managed by the school, it may even be joined to AzureAD only.

Why does this matter? As an example, I was talking with a school recently where teachers were required to use up to four different usernames/passwords to access their key platforms such as signing into a computer, accessing their email, accessing their Student Management System (SMS) and accessing their cloud collaboration suite (Office365 in this case). Simplifying this through a single cloud identity saves time and frustration for everyone! It also improves security as people are more likely to choose a secure password if they only have one to remember.

Additionally, schools are increasingly wanting to sign into third party cloud apps with the same credentials – this blog post I wrote shows a school accessing eight different solutions with just their AzureAD identity.

The key point is: identity matters. If your school does not have a cloud identity of some sort, you’re going to be inherently limited in what you can do.

As the focus of this blog is primarily around AutoPilot, I’m not going to go deep into Identity – some useful background reading I would share is earlier blog posts I’ve written around:

For the purposes of this blog, if you’re wanting to use AutoPilot then your Office365 Tenant must have either the AzureAD P1 or P2 plans – see the differences here. With many schools opting for the M365 A3 Suite, this includes AzureAD P1:

Azure Active Directory Premium P1. In addition to the Free and Basic features, P1 also lets your hybrid users access both on-premises and cloud resources. It also supports advanced administration, such as dynamic groups, self-service group management, Microsoft Identity Manager (an on-premises identity and access management suite) and cloud write-back capabilities, which allow self-service password reset for your on-premises users.

To proceed with AutoPilot you need your users in AzureAD (and licensed with P1 or P2) so if you’ve not got that far, best to stop and sort before continuing on (if you want help with this, check out School Data Sync which can automatically add users from your Student Information System).

Why use AutoPilot?

It’s always a good question to ask, and before answering if you’re brand new to AutoPilot then it’s worth watching the video at the top of this blog post and then getting into the official AutoPilot Documentation here. If you’re coming from an Apple device management world and are familiar with the Device Enrollment Program (DEP) then the concepts of AutoPilot will be very familiar for you.

AutoPilot

Windows Autopilot is a collection of technologies used to set up and pre-configure new devices, getting them ready for productive use. You can also use Windows Autopilot to reset, re-purpose and recover devices.
This solution enables an IT department to achieve the above with little to no infrastructure to manage, with a process that’s easy and simple.

Windows Autopilot is designed to simplify all parts of the life cycle of Windows devices, for both IT and end users, from initial deployment through the eventual end of life. Leveraging cloud-based services, it can reduce the overall costs for deploying, managing, and retiring devices by reducing the amount of time that IT needs to spend on these processes and the amount of infrastructure that they need to maintain, while ensuring ease of use for all types of end users.

Back to the why use it…..

  • Devices become enrolled / locked to your organisation. If a user (authorised or not) resets the Win10 OS back to factory settings, as soon as it connects to the internet again it will register back to your organisation, making it largely useless to anyone if it was stolen.
  • Speeds up and simplifies the Win10 setup process – you can optionally skip quite a few of the steps you normally need to undertake in Win10 e.g. requiring the user to agree to the EULA, choosing their privacy settings, configure whether the user will be an Administrator or a Standard user, and depending on deployment mode, can even skip keyboard preferences.
  • Devices can be assigned to specific users, meaning when they turn it on for the first time, connect to the internet they’re greeted by name as part of their organisation.
  • AutoPilot Reset allows an IT Admin to remotely reset the device, returning it to the original state, but keeping it joined to AzureAD and enrolled into Intune for management – think of this like a “spring clean” at the beginning of the school year or new Term.

In short, AutoPilot is designed to make your life easier!

Configuring Autopilot

For my demo and testing, I’m using an Acer B117 laptop, something that is available in the NZ Education Right Device Campaign, a low cost, low spec Win10 device with 4GB RAM and options around 64/128GB SSD storage. One of the beauties of AutoPilot is that supported OEM devices can send the unique Hardware Identifier (HWID) to the purchasing organisation / school in advance of receiving the devices, allowing for the configuration of the entire environment in advance of even receiving the hardware.

An obvious upside for this would be the ability to ‘drop ship’ devices to remote employees directly from purchase, without the need for IT Admins to even site the device.

In my case, I needed to manually extract the HWID from the Acer laptop, which can easily be accomplished with some basic PowerShell (run as local Administrator):

md c:\\HWID Set-Location

c:\\HWID Set-ExecutionPolicy Unrestricted

Install-Script -Name Get-WindowsAutoPilotInfo

Get-WindowsAutoPilotInfo.ps1 -OutputFile AutoPilotHWID.csv

PowerShell.PNG
Basic PowerShell commands will allow you to extract the unique Hardware Identifier (HWID) for your existing device – this is required for AutoPilot to run

With the HWID obtained, the process to complete the configuration of AutoPilot is easily followed by these step by step instructions here, but largely consist of the following steps:

  1. Add your devices (HWID) into Intune
  2. Create an AutoPilot Device Group (tells Intune which devices in your organisation should be managed by AutoPilot). Note you can do both static and dynamic rules for adding devices here.
  3. Create an AutoPilot Deployment Profile – this is the configuration settings you want to choose and allows you to skip a number of the standard Win10 decisions that need to be made when a device is being set up for the first time.
  4. Assign an AutoPilot Deployment Profile to a Device Group – this matches what you’ve created in Step 2 with Step 3
  5. Assign a user to a specific AutoPilot Device – this optional step allows you to match a user in your organisation with a specific device. The net result of this is the first time the user turns on the computer and connects it to the internet their name and email address is pre-populated in the setup process, meaning they only need to confirm their password during the setup – very cool!

The documentation I’ve linked to is pretty clear – it took me about thirty minutes to follow along and set the above up the first time I ran it.

Enrolling Your Device

Now the fun really beings. With the configuration completed, you can take your brand new ‘out of the box’ device and enroll it using AutoPilot for a truly streamlined, managed experience.

I took some photos of the experience using my phone camera (photo quality is average) and anyone that has ever set up Windows 10 will be familiar with this process:

2019-03-01 15.09.13
A user must always choose their region

2019-03-01 15.09.31
Keyboard preference remains a requirement

2019-03-01 15.09.41

2019-03-01 15.10.17
At this point, once the device is connected to the internet it will automatically join AzureAD and enroll into Intune because the HWID is registered with your tenant. Further Win10 setup steps can be optionally skipped at this point based on the Autopilot Profile configuration.

2019-03-01 15.10.30
The device immediately starts to configure based on AutoPilot Deployment Profile you’ve created and assigned to the Device Group

2019-03-08 11.43.43
This screenshot shows AutoPilot busily configuring the device and giving progress updates – the time this takes varies based on how many apps you’ve chosen to push to the device.

2019-03-01 15.12.38_LI
Done! Note the following: 1) School logo is displayed 2) User is greeted by name if the device is specifically assigned to a user 3) The school/organisation name is displayed; 4) The user’s email address is displayed 5) A customisable welcome message is displayed with contact details for assistance.

At this point, the device settings and applications are installed (or possibly still coming down over the internet) but the device is ready for us.

The end user had minimal choices and actions required of them:

  1. Choose their country
  2. Choose their keyboard
  3. Connect to the internet (this could even be their home WiFi)
  4. Enter their organisation password (Office365)

My Thoughts

Modern deployment relies on the cloud for identity and provisioning of devices – there are no on-premise servers in the above model. This allows for fast, flexible and lower cost management of devices – something that appeals to education institutes where every dollar counts!

Whilst I’ve gone through the configuration pretty quickly above, along with a high level ‘rationale’ of why you’d want to do this, the next post will go a bit deeper into when to use Intune vs Intune for Education, and a couple of tweaks to make your devices run even faster at sign in and have key applications appear instantly whenever a new user signs in. I’ll likely post this in the next week or so.