Categories
Microsoft365

Guest Post: Managing iOS / iPadOS Devices with Intune (Microsoft Endpoint Manager)

UPDATE 22nd April 2020: Matt has posted another blog around iOS and Intune/Endpoint Manager, this time around how to push apps out to the devices. You can read this here.

I’m always quick to acknowledge when someone has done an awesome blog post and today I’m sharing another one from Matt Soseman, whose work I’ve highlighted before on this blog, notably:

His most recent blog post was focused on using Intune to manage iOS and iPadOS devices – something I’ve also got a strong interest in and have previously blogged about extensively in a five part blog series co-authored by David Colville:

  1. Intune & iOS – Setting Up
  2. Intune & iOS – Adding iOS Devices Using Device Enrollment Program (DEP)
  3. Intune & iOS – Assign Applications To Devices
  4. Intune & iOS – Setting Up Profiles
  5. Intune & iOS – Building A Custom Profile

Intune Evolves Rapidly – New Blogs Are Needed!

Given the rapid rate of change with Intune (now called Microsoft Endpoint Manager), new and updated blog posts are required. If you need convincing on how rapidly Intune evolves, check out the weekly release notes…..

To that end, Matt’s latest blog post is very welcome and goes through in great detail how you can enroll and manage iOS and iPadOS devices using Intune:

Read Matt’s Blog Post Here

As Matt explains it,

When it comes to managing iOS and iPadOS devices within the organization, Microsoft Intune (aka Microsoft Endpoint Manager) has the capability to manage these devices via Mobile Device Management (MDM). This allows the operating system (OS) to be managed, fully customizing the device to the organization’s requirements.

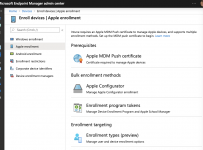
Intune Interface to manage iOS and iPadOS devices

Need A Simpler Interface?

If the above guide from Matt is a little too complex, don’t forget that the simplified interface of Intune for Education allows for the full management of iOS and iPadOS devices too – read the documentation on how to do this here.

Again, if you want to read Matt’s blog post and the step by step guide, I really encourage you to check out his blog post here. Matt has also helpfully shared all the images in a single slide deck (without the instructions on his blog) that you can see below:

Categories
Microsoft365

Federated Authentication Links Apple School Manager With AzureAD

As I have blogged about many times before, identity is key to setting up a school successfully to enable seamless single sign on (SSO) into the wide variety of digital tools used in the modern classroom.

This morning the awesome David Colville (who largely authored this five part series on managing iPads with Intune) tipped me off to a new addition to Apple School Manager that allows for Federated Authentication of Managed Apple ID’s using Azure Active Directory (AzureAD).

Read the Apple documentation here.

As a starting point, you do need to understand what Federation means in this context, so a helpful explanation from Wikipedia is:

A federated identity in information technology is the means of linking a person’s electronic identity and attributes, stored across multiple distinct identity management systems.

Federated identity is related to single sign-on (SSO), in which a user’s single authentication ticket, or token, is trusted across multiple IT systems or even organizations. SSO is a subset of federated identity management, as it relates only to authentication and is understood on the level of technical interoperability and it would not be possible without some sort of federation

What does this actually mean?

Apple Federated
Image credit.

As per the explanation from Apple’s documentation:

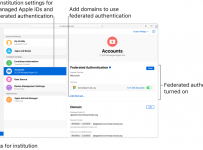
You use federated authentication to link Apple School Manager to your instance of Microsoft Azure Active Directory (AD). As a result, your users can leverage their Microsoft Azure AD user names and passwords as Managed Apple IDs. They can then use their Microsoft Azure AD credentials to sign in to their assigned iPad or Mac and even iCloud on the web. Students can also use it to sign in on Shared iPad.

Using SAML, students would be able to use their single username/password from AzureAD to authenticate against their Apple devices, making it simple for students and easy for IT staff to manage their identity.

According to the documentation, when you federate Apple School Manager with AzureAD, Managed Apple ID’s are created automatically allowing users to sign into their Apple devices with their school email address and password.

What Is Required To Federate?

There are four main steps to link Apple School Manager to Microsoft Azure AD:

  1. Start the federated authentication process.
  2. Connect to your identity provider by linking Apple School Manager to Microsoft Azure AD.
  3. Verify your Azure AD domain ownership.
  4. Turn on and test federated authentication.

The full technical step by step guide to configuring this is available on Apple’s documentation here and I encourage you to check it out.

My Thoughts:

I have been travelling extensively across Asia and New Zealand recently but the consistent conversation that emerges is the importance for schools to get their cloud identity sorted early on, to unlock the almost limitless resources available on the internet.

Increasingly, there is inter-operability between major cloud platforms through Federated Domains and Single Sign on. AzureAD is widely supported and provides a simple way for schools to access the resources they need.

Guest Posts: Intune & iOS – Building A Custom Profile

MicrosoftIntuneThe following five guest posts are written by David Colville, with some light editing by me. I first met David online in 2015 when I was exploring Microsoft PowerBI and its suitability for educational analytics at St Andrew’s College. David connected me with Datacom New Zealand and their BI Team and the rest, as they say, is history. Since the initial introduction, our paths have crossed digitally many times, yet only once in person! Recently we chatted online about using Intune to manage iOS devices in educational contexts and from there the idea of a series of blog posts emerged. We have decided to split these reasonably technical and lengthy posts into the following five topics:

  1. Intune & iOS – Setting Up
  2. Intune & iOS – Adding iOS Devices Using Device Enrollment Program (DEP)
  3. Intune & iOS – Assign Applications To Devices
  4. Intune & iOS – Setting Up Profiles
  5. Intune & iOS – Building A Custom Profile

I am really thrilled to have David share his expertise in these posts and it highlights the value of building a Professional Learning Network (PLN) online, as without our initial virtual engagements, I would not have had access to his knowledge and skills. So I extend a huge thanks to David and strongly encourage you to connect with him on Twitter.

What Is The Need For A Custom Profile?

There are a lot of different Mobile Device Management (MDM) solutions available on the market and they all differentiate themselves through the various features that they can control or restrict on the end device. Intune has a growing list of settings within the “Device Configuration” blade, however it is virtually impossible to provide all of the available settings contained in Apple’s XML configuration keys.

This is where the creation of Custom Profiles works best. ICT administrators can quickly create a Custom Profile to add unique control requirements onto an iPad. During a conversation I had with Sam McNeill, he pointed out that one of the Profiles mentioned in the Configuration Profile Reference note was this one designed to prevent end users from removing Apps installed on the iPad:

Blog 0

This is virtually a requirement for any school setting, as you can imagine how keen mischievous students would be to “accidentally” remove Apps they needed! Unfortunately, the current “Device Configuration” settings in Intune does not have a GUI setting for this particular configuration.

This configuration does however appear in the Apple Configurator Restriction section and it is relatively easy to create a new “Custom Profile” for these settings in Apple Configurator 2 and then import into Intune’s Custom Profile area.

Creating A Custom Profile In Apple Configurator:

Launch Apple Configurator and from the “File” menu create a New Profile:

Blog 1

Give the Profile a meaningful name in the “General Section” such as “Disable App Removal.” Note: this is what it will show up and be identified as in the System Preferences on the iPad:

Blog 2

Next, navigate into the “Restrictions” section and in the “Functionality Section” you can turn off the “Allow Removing Apps” checkbox:

Blog 3

This Profile can then saved. In my example here I put this on the Desktop of my MacBook and called it “Disable App Removal”

Blog 4

These Profile files show up as a “Config” file which can be opened up with virtually any Text Editor (in this case, I used Apple’s “Xcode” because it is aware of the correct formatting and will apply colour coding for ease of reading).  As mentioned earlier, this is really just an XML text file containing a large number of various settings because the one Configuration Profile includes the entire “Restrictions” section we saw in the Apple Configurator earlier (see above):

Blog 5

Because the Configuration Profile is simply XML, we can easily go through and trim it down to only include the “AllowAppRemoval” section or “Key”, and we’ll import this configuration into Intune. This is an important step to take as it will prevent you from accidentally importing other restrictions onto the iPad that you don’t actually intend to apply. In this example, we are simply trying to prevent the end user removing Apps from the iPad so the key configuration key is highlighted below:

Blog 6

Importing & Assigning The Custom Profile Into Intune:

Once the XML has been trimmed it can be uploaded into Intune. To do this, you need to navigate to the “Device Configuration” blade we have been to frequently throughout these tutorials, but in this instance we’ll create a new “Custom Profile”:

Blog 7

You will be prompted to upload the custom (trimmed/edited) Configuration Profile that we saved earlier on our Desktop:

Blog 8

Once the Custom Profile is uploaded to Intune, you will need to assign this to the required iPads in a similar process to that of assigning Apps to the iPads. First select the “Assignments” menu on the left hand side:

Blog 9

Then select the Group(s) you want to assign this new Custom Profile to:

Blog 10

Once this is pushed out to an iPad you will be able to see the Restrictions applied on through the “Settings: General: Profiles” section. Look for the name of the MDM (in our case, Intune) in the list provided and you can drill down to the “Restrictions” being enforced by the MDM.

Here we can see the App Removal restriction created earlier:

Blog 11

With this restriction in place, if a user attempts to remove an App the iPad interface will only allow them to move icons around on the home screen (icons wobble), but not delete any Apps (there is no “x” beside the icon to remove the App).

Over time Microsoft may add this Configuration key to Restrict App Removal directly into the Intune GUI features, and thus remove the need to build a Custom Profile configuration. However, there are always extra Configuration Keys being added by Apple so it’s always useful to be able to upload Custom Profiles (another example is adding a WPA2 Pre-Shared Key as a Custom Profile for wireless settings, so that end users do not need to enter (or even know) the WiFi password).

Conclusion:

Over the last five blog posts we have covered off in significant detail how to use Microsoft Intune to manage iOS devices (iPads and iPhones). These same principals can be applied to using Intune to manage MacBook laptops (MacOS), Android devices and, of course, Windows 7-10 devices. The five steps we have demonstrated are:

Intune is a very powerful MDM and demonstrates how you can use modern deployment methods to manage and protect both company/school owned devices as well as BYOD options as well. It is 100% Azure cloud hosted and very scalable for large organisations or School Districts.

I trust you’ve found this series helpful and I do encourage you to connect with David Colville who authored the vast majority of these blog posts. Feel free to drop comments or questions in the comments section below and thanks for reading!

Guest Posts: Intune & iOS – Setting Up Profiles

MicrosoftIntune

The following five guest posts are written by David Colville, with some light editing by me. I first met David online in 2015 when I was exploring Microsoft PowerBI and its suitability for educational analytics at St Andrew’s College. David connected me with Datacom New Zealand and their BI Team and the rest, as they say, is history. Since the initial introduction, our paths have crossed digitally many times, yet only once in person! Recently we chatted online about using Intune to manage iOS devices in educational contexts and from there the idea of a series of blog posts emerged. We have decided to split these reasonably technical and lengthy posts into the following five topics:

  1. Intune & iOS – Setting Up
  2. Intune & iOS – Adding iOS Devices Using Device Enrollment Program (DEP)
  3. Intune & iOS – Assign Applications To Devices
  4. Intune & iOS – Setting Up Profiles
  5. Intune & iOS – Building A Custom Profile

I am really thrilled to have David share his expertise in these posts and it highlights the value of building a Professional Learning Network (PLN) online, as without our initial virtual engagements, I would not have had access to his knowledge and skills. So I extend a huge thanks to David and strongly encourage you to connect with him on Twitter.

Setting Up / Creating Profiles:

Once you’ve setup a device and added applications (as demonstrated in the previous three blog posts), you will often want to setup what are called Profiles that provide custom restrictions on the iPad.

Most commonly Profiles are used for minimizing access to Adult Content, or making sure that you’re distributing Apps via the Mobile Device Manageement (MDM) platform, in this case Intune, rather than leaving the Apple Store active for end users to simply install whichever Apps they choose. Another use of Profiles can be to install certificates on a device to enable it to authenticate to a wireless network for example.

Apple uses the ‘Configuration Profile’ method for pushing settings out to devices – these can be settings delivered to both iOS devices( (iPads or iPhones) and MacOS computers (MacBook Air/Pro etc). These settings are deployed through an XML formatted ‘mobileconfig’ file.  These can be installed in a few different ways, but most commonly this is done via an MDM like Intune or, using Apple’s own software, called ‘Apple Configurator.’

Apple have a large reference site of the XML configurations available on this page, and in Intune there is a section where you can define these settings through the “Device Configuration – Profiles” blade.

To get started, create a new profile of type “Device Restrictions”- and you’re prompted  with a wide range of settings:

blog 1

Apple have provided a really extensive range of settings that can be configured through the use of Profiles and it is worth checking these out for yourself and identify those that best fit your schooling environment. The following are some that I regularly apply for a K-6 school.

The “General” section includes restrictions around “Account Modification.” This is incredibly useful if you want to automatically setup email accounts via your MDM (in this case, Intune), but prevent the user from being able to remove it.  You can also prevent the user changing the device name or being able to erase the device (which would result in it becoming un-managed at the same time):

blog 2
Note the ease of changing configuration settings – you simply choose to “Allow” or “Block” or leave “Not Configured” which means the end user can modify that setting on the device.

Another group of settings that are commonly restricted through Profiles are access to the App Store, Document Viewing, and the Gaming section which includes the ability to lock down the App Store and crucially, In-App Purchases (to avoid any unexpected surprises on the credit card!):

blog 3

Lastly, the “Built-In Apps” section may have some restrictions you’d like to control such as access to the News, Music and other default Apple Apps that you might want to prevent students from using:

blog 4

Assigning Profiles To Devices:

Once you’re comfortable with these settings and creating a Profile, you can “assign” them to a group of devices, in a way that is similar to assigning Apps to devices in the previous blog post.

The easiest way to create a group of devices is through the “Users” section – where you can build up dynamic groups. These dynamic groups will search for all devices based on criteria that you define, for instance, here is my group for all iOS devices (both iPads and iPhones):

blog 5

Note that in my testing this took around 15 minutes to reflect the devices I was expecting to appear in my dynamic group. This may have been due to them needing to be inventoried on their initial enrollment into Intune.

Once the devices started showing up I went back to the “Device Configuration – Profiles” blade in Intune and used the Assignments section to apply my restriction to the “All iOS  Devices Group”:

blog 6

Again, this took around 15 minutes to apply to the iPads – it would appear that Intune restricts sending out the Push Notifications required for the policies to apply to a rotating schedule of once every 15 minutes.

Recap:

In this blog post we have learnt how to apply just a small number of the restrictions Apple allows to iPads and iPhones through the use of Profiles. Intune is growing this list within the Graphical User Interface (GUI) all the time, however there is a lot more that can be done using the XML keys provided by Apple.

In the final blog post in this series, we will explore how we can create Custom Profiles within Intune, essentially using the raw XML keys to provide additional settings and restrictions that are not currently directly configurable within Intune’s GUI. Custom Profiles are a critical feature of Intune as it provides an administrator the ability to replicate any other feature provided in other MDMs.

Guest Posts: Intune & iOS – Assigning Applications To Devices

MicrosoftIntuneThe following five guest posts are written by David Colville, with some light editing by me. I first met David online in 2015 when I was exploring Microsoft PowerBI and its suitability for educational analytics at St Andrew’s College. David connected me with Datacom New Zealand and their BI Team and the rest, as they say, is history. Since the initial introduction, our paths have crossed digitally many times, yet only once in person! Recently we chatted online about using Intune to manage iOS devices in educational contexts and from there the idea of a series of blog posts emerged. We have decided to split these reasonably technical and lengthy posts into the following five topics:

  1. Intune & iOS – Setting Up
  2. Intune & iOS – Adding iOS Devices Using Device Enrollment Program (DEP)
  3. Intune & iOS – Assign Applications To Devices
  4. Intune & iOS – Setting Up Profiles
  5. Intune & iOS – Building A Custom Profile

I am really thrilled to have David share his expertise in these posts and it highlights the value of building a Professional Learning Network (PLN) online, as without our initial virtual engagements, I would not have had access to his knowledge and skills. So I extend a huge thanks to David and strongly encourage you to connect with him on Twitter.

Assigning Applications To Devices Overview:

Once you have the iPads enrolled into Intune for mobile device management (MDM), the first thing most ICT Admins want to do is push applications to them as quickly and uniformly as possible. In an educational context where students share devices, most teacher want the iPads to be as similar as possible so that all applications are identical.

At a high level, this process works as follows:

  1. Setup a Token that enables communication between Apple’s Volume Purchase Program store (VPP) and Intune.  This only needs to be done once per year.
  2. “Buy” Apps through the Volume Purchase Program store (this includes free apps as well as paid).
  3. Configure Intune to perform a regular check with the VPP Store and through this process identify any apps that you may have purchased.  Once they are visible within Intune, you can assign the Apps to the devices you have enrolled into Intune (as per the instructions here in the previous post).

Purchasing Apps Via Apple’s Volume Purchase Program:

The first place you need to go is Apple’s Volume Purchase Program store.  This is available at:

https://volume.itunes.apple.com

Now, depending on whether you’re an Education or Business customer you may see some minor differences. The features are pretty much the same, except that in the Education store if you buy 20 or more Apps you get them at half price (for most Apps).

Blog 1
Customers get the choice when they first sign into the Volume Purchase Program to identify if they are an education customer.

Once you’ve selected Education, you can sign in and start searching for the app you wish to add to the devices:

Blog 2

Select the app from the list that you’re wanting to “buy” (even with free apps you need to go through the purchase process):

Blog 3

Once you’ve selected an app, in this example we are choosing a free one, you can purchase your desired number of licenses that you require. For free apps it’s often a good idea to “buy” a few more than you actually need in case you end up with some extra iPads at a later date:

Blog 4

You need to click “Place Order” in the bottom right to proceed, at which point you’ll likely be asked to log in again to authenticate the purchase and this process can take up to a few minutes to complete:

Blog 5

While here, you will want to obtain your “VPP Token” which can be uploaded into Intune.  Go to the “Account Summary” section in the top-right of the window, and click “Download Token”.  Save this file somewhere safe because you’ll need it shortly:

Blog 6

This completes the work required to purchase apps in Apple’s Volume Purchase Program and now you need to sign back into Intune through the Azure Portal to complete the final steps of assigning the applications to devices.

Configuring Intune To Distribute Apps To Devices:


Once you have signed back into Intune you need to move from the Intune Blade into the “Manage: Mobile Apps” blade. Reminder: in Intune groups of settings are known as “blades” and expand from left to right. You need to close each blade or scroll from right to left to go “back” in your settings selections.

Scroll down the Mobile Apps blade to the “Setup” section and look for iOS VPP Tokens:

Blog 7

Once in that blade, you want to select “Add an iOS VPP Token”

Blog 9

Upload the token you downloaded earlier (see above) into this section and then enter the Apple ID you used to login to the VPP Store.

Click “Upload” and after a “Sync” the Volume Purchase Program Store will sync all the Apps you’ve purchased into Intune, and allow them to be assigned to the devices you have in Intune:

Blog 10

Assigning Apps To Devices In Intune:

A quick recap of what we have achieved so far:

  1. We have “purchased” apps via Apple’s VPP setup. These could be either free or truly paid for commercial apps.
  2. We then set up Intune to connect to the VPP through the token and then synchronized Intune with VPP so that all purchased apps are now visible within Intune.

The next step is to assign that App  (or Apps) to a single device or indeed, a group of devices.

Make sure you are still in Intune and in the “Mobile Apps / Apps” blade. You should be able to see the Apps that have been purchased earlier.  In my example here, I filtered out a few others and just found the Adobe App I purchased earlier:

Blog 11

By clicking on the App that I want to Assign a third blade appears, where I can choose to Assign the App to a particular device or group of devices through the “Assignments” section.  By clicking “Select Groups” we are provided with a choice of the Groups we want to assign it to:

Blog 12

You need to choose a group of devices and then select them to be “Required” with “Device Licensing” and this will then automatically assign the App out to the devices in that Group.  If you use choose “User Licensing” the end user is prompted for an Apple ID when the App is pushed to their device.  In a schooling context, this might be usable for older students or staff, but is frankly less commonly used these days.

Blog 13

Please Note: It can take around 10-15 minutes for the Apps to be pushed out to the devices, so you may want to plan ahead.  If the device is “Supervised” (using Apple Configurator or Device Enrollment Program)  then the App will be pushed without the user needing to interact with the device. Conversely, if the device is not Supervised, the user will be prompted to accept the App install at which point it will proceed without needing an Apple ID to be entered.

We’ve covered a lot of content in the first three blog posts of this series and by now you should be able to:

  1. Set up Intune through the Azure Portal to connect with Apple’s Device Enrollment Program (DEP)
  2. Enroll and configure devices with DEP into Intune
  3. Purchase and assign Apps to devices through the VPP store.

In the remaining two blog posts we will cover off:

  1. How to create and assign Profiles to the iPads – this will allow you to put further restrictions in place in terms of what students or teaching staff can do with the devices
  2. How to create custom Profiles in Intune – this is important for any additional features using Apple’s XML keys e.g. preventing students from removing apps on an iPad.

Stay tuned for the next posts!

Guest Posts: Intune & iOS – Adding iOS Devices

MicrosoftIntune

The following five guest posts are written by David Colville, with some light editing by me. I first met David online in 2015 when I was exploring Microsoft PowerBI and its suitability for educational analytics at St Andrew’s College. David connected me with Datacom New Zealand and their BI Team and the rest, as they say, is history. Since the initial introduction, our paths have crossed digitally many times, yet only once in person! Recently we chatted online about using Intune to manage iOS devices in educational contexts and from there the idea of a series of blog posts emerged. We have decided to split these reasonably technical and lengthy posts into the following five topics:

  1. Intune & iOS – Setting Up
  2. Intune & iOS – Adding iOS Devices Using Device Enrollment Program (DEP)
  3. Intune & iOS – Assign Applications To Devices
  4. Intune & iOS – Setting Up Profiles
  5. Intune & iOS – Building A Custom Profile

I am really thrilled to have David share his expertise in these posts and it highlights the value of building a Professional Learning Network (PLN) online, as without our initial virtual engagements, I would not have had access to his knowledge and skills. So I extend a huge thanks to David and strongly encourage you to connect with him on Twitter.

Adding Devices using Device Enrollment:

The best (and easiest) way is to use Apple’s “Device Enrollment Program” (which is part of the Apple School Manager program).  This allows for a brand new iPad to be assigned automatically to the Mobile Device Management solution when they are activated – in this case, Intune.

What this means in practice is once the person receives their device they:

  1. Turn it on
  2. Join a wireless network
  3. The device activates, and they’re advised that the school or institution can automatically configure the device
  4. The device then guides them through a custom configuration including skipping steps during the setup process for quicker deployment.

If you’re thinking this all sounds quite familiar, then it’s probably because Microsoft recently released a similar program for deploying Windows 10 devices called AutoPilot.

Intune BlogTo set all this up, it’s a similar process to the push notification setup from the previous blog. In this case you generate a certificate in the Intune portal, upload that into the Apple School Manager site, and then receive a certificate you can upload back into Intune to continue the communication.

Once this is configured, settings for all devices that are enrolled can easily be defined. Microsoft calls these ‘Enrollment Program Profiles’

Defining the Device Management Mode settings depends a little on the intended use of the device. Remember ‘Supervision’ provides you with a lot more control as an admin over the Device, including the ability to push apps to a device without needing the owner of the device to ‘accept’ the app push, consequently these are sensible defaults for most usage in schools.

The ‘Allow pairing’ if not set to ‘All’ stops teachers being able to get photos from an iPad and onto their own computers. Depending on how you’re planning on deploying the iPads then it could be a good idea to leave it on ‘Allow All’

Blog1.jpg

When deploying iPads as student devices into schools using Intune I usually skip all the settings except the location,  simply because by enabling the location services it will fix the clock and timezone setting on an iPad automatically.  They usually come out of the box with their timezone set to Los Angeles  and it’s nice to fix this upfront!

For staff devices, you will likely give them some additional control compared to students, fortunately Intune makes it easy to enable more features for them such as requiring them setup a Touch ID on their device. Remember most of the settings can be configured later – this only affects the initial setup experience.

Blog2.jpg

Once you have defined the configuration, you need to choose which devices you wish to have these settings applied to them. To do this, use the ‘Assigned Devices’ on the left to select a particular device as having that workflow assigned to it.
Blog3

Any iOS device that you have enrolled in this way will show up in the “Enrollment Program Devices” section.

Once the end user (either student or teacher) goes through the setup of the iOS device, they will be advised that their company/school can “Configure the Device Automatically.”

At this stage, any steps you left enabled in the Setup Assistant Settings section are prompted for completion by the user. When they complete these and get to the home screen the device will have completed the enrollment into Intune, and can’t be un-enrolled without erasing the Device (provided you selected to ‘supervise’ and ‘locked enrollment’ during the configuration).

In the next blog post in this series, we will look at how to assign an application to the device itself (and not just an individual with an Apple ID).